Waalaxy LinkedIn Review: Unlock Explosive Growth with Automation

Waalaxy LinkedIn Review: The Best LinkedIn Automation Tool for Growth

How I Discovered This Powerful LinkedIn Tool

As a software engineer and entrepreneur, growing my LinkedIn network efficiently was a challenge. I needed a tool that could automate outreach without sacrificing personalization. That’s when I discovered Waalaxy, a powerful LinkedIn automation tool that transformed my networking strategy.

What is Waalaxy?

Waalaxy is a browser extension that helps you automate LinkedIn outreach by sending personalized connection requests and follow-up messages on your behalf. This allows you to expand your professional network rapidly while saving time on manual tasks

How This LinkedIn Automation Tool Works

Using Waalaxy is incredibly simple and intuitive:

  1. Find Your Target Audience – Use LinkedIn’s search feature to identify professionals you want to connect with.
  2. Upload Your List – Export your LinkedIn search results and upload them into Waalaxy.
  3. Create an Outreach Campaign – Set up a customized campaign to send automated connection requests and follow-up messages.
  4. Let Automation Work for You – The extension automates outreach, allowing you to focus on high-value interactions.

Why Waalaxy is a Game-Changer for LinkedIn Growth

Massive Time-Saver – No need to send connection requests and messages manually.
Automated Follow-Ups – Ensure consistent engagement with your new connections.
User-Friendly Interface – Perfect for beginners and experts alike.
Boosts Productivity – Focus on closing deals instead of tedious networking tasks.
Higher Conversion Rates – Personalized automation leads to better responses and engagement.

My Experience: Results in Just One Week!

A screenshot of Waalaxy in action, showing how users can automate LinkedIn outreach with personalized messages and follow-ups.

To test Waalaxy, I created a campaign targeting founders in Dubai. Here’s what happened:

  • 300 invitations sent automatically
  • 20 accepted connections
  • 4 meaningful replies to my messages
  • 2 high-value clients acquired

This proves how powerful Waalaxy is for accelerating LinkedIn growth, generating leads, and turning connections into real business opportunities.

"Waalaxy LinkedIn automation tool interface displaying automated connection requests and follow-ups.
Streamline your LinkedIn networking with Waalaxy automation.

How to Get Started ?

If you want to grow your LinkedIn network effortlessly and generate more business opportunities, this is the tool you need.

👉 Try Waalaxy for free here.

More LinkedIn Growth Strategies

At CodeProgres, we provide training and tools to help professionals master AI, automation, and digital marketing. Check out our resources:

Final Thoughts on LinkedIn Automation

Waalaxy is a game-changer for LinkedIn professionals looking to scale their networking and lead generation efforts. If you’re serious about LinkedIn growth, it’s time to leverage automation.

🔹 #LinkedInGrowth 🔹 #NetworkingTips 🔹 #LeadGeneration 🔹 #B2BMarketing
Unlock Your Website’s Full Potential with WordPress: Build, Grow, and Succeed!

🚀 Want to Build a Stunning Website Without the Hassle? Let’s talk WordPress—the #1 platform used by millions of website owners, bloggers, and businesses around the world! Whether you’re a complete beginner or a seasoned pro, WordPress is designed to help you create a powerful, stunning website that works for you—no coding required!

But why is WordPress so popular, and why should YOU choose it over traditional website coding? Let’s dive in and find out!


🤔 What is WordPress, Exactly?

WordPress is a content management system (CMS) that makes website building easy, fast, and cost-effective. Whether you’re launching your first blog, building an online store, or creating a business site, WordPress has the tools and flexibility you need to make it happen.

With WordPress, you can create your dream website without touching a single line of code. It’s free, open-source, and has tons of customizable themes and plugins to suit your needs. Simply put, WordPress is here to make your website-building journey a breeze—and here’s why it’s a game-changer.


🔥 Why WordPress Crushes Traditional Custom-Coded Websites

1. Save Time & Money ⏳💸
Let’s face it—building a custom-coded website is time-consuming and expensive. You’ll need a developer, hours of back-and-forth communication, and lots of money. With WordPress, you can launch your site in a fraction of the time, and for a fraction of the cost. Whether you want a basic blog or a full-fledged e-commerce store, WordPress lets you do it all without draining your wallet.

2. No Coding Skills? No Problem! 👨‍💻
WordPress is designed for everyone—you don’t need to be a developer! Its drag-and-drop interface lets you build stunning websites with zero technical skills. Choose from pre-made themes, customize layouts, and add features with ease.

3. Built-In SEO Magic ✨📈
Want to rank high on Google? WordPress is optimized for search engines, and with powerful SEO plugins like Yoast SEO, it helps you boost your visibility and grow your audience. Unlike custom-coded websites, WordPress automatically takes care of many SEO tasks, so you can focus on creating amazing content.

4. Super Secure & Regular Updates 🔒🔄
Worried about security? WordPress has your back with regular updates and built-in features that keep your site secure. Custom-coded websites often need constant attention, making them more vulnerable to hacks. With WordPress, updates are automatic, and security is top-notch.

5. Unlimited Customization & Flexibility 🔧🎨
From blogs to e-commerce sites, WordPress offers endless customization options. Want to add a contact form, integrate social media, or create an online store? There’s a plugin for that! WordPress grows with you as your needs evolve.


🎯 Here’s How to Get Started with WordPress

Step 1: Choose Your Domain & Hosting 🌐
Pick a domain name (your site’s address) and choose a hosting provider that supports WordPress. Many hosts offer one-click WordPress installations—so you’ll be up and running in no time!

Step 2: Install WordPress 🛠️
Installing WordPress is a walk in the park. It only takes a few clicks, and your website is ready for action.

Step 3: Pick a Theme & Customize 🎨
Explore thousands of themes available in the WordPress theme directory. Pick one that fits your brand, then customize it with your logo, colors, and style. It’s that easy!

Step 4: Add Plugins for Extra Features 🔌
Want to add SEO tools, contact forms, or an online store? Simply install plugins to extend the functionality of your site. No coding required!

Step 5: Publish & Share Your Content 📢
Once your site looks perfect, hit publish and share your amazing content with the world. Whether it’s a blog post, product listing, or gallery, WordPress makes it easy to manage and grow your site.


💥 Why WordPress is the Future of Website Creation

Here’s the truth: WordPress isn’t just a tool—it’s a movement. With its user-friendly interface, customization options, and SEO power, WordPress is the platform that empowers anyone to create an impressive website. From entrepreneurs to global brands, WordPress is changing the game—and it’s about time you joined the revolution!

Ready to take the leap? Don’t let your website dreams stay on the shelf. Start with WordPress today and unlock the power of a fast, flexible, and secure website. Click the link below to get started:

👉 Create Your Website with WordPress Now!


🏁 Don’t Wait – Your Dream Website is Just a Click Away!

Stop wasting time and money on complicated and costly website solutions. WordPress is the perfect choice for anyone who wants to build, customize, and grow a successful website with ease. It’s fast, reliable, and built for everyone—and the best part? You can start today!

Take action now and see why millions of users trust WordPress to bring their websites to life. Your online success starts here!

Click here to get started and build the website you’ve always wanted! 👉 Start Building with WordPress

🌟 Host vs Domain: What You’re Getting Wrong—and How to Fix It


Introduction

When you’re setting up a website, one of the first questions you’ll face is: What’s the difference between a host and a domain? If this sounds confusing, you’re not alone. It’s one of the most misunderstood aspects of building an online presence—and getting it wrong can lead to costly mistakes.

Here’s the ultimate guide to understanding hosts and domains in plain, simple terms (with a touch of polemic). First, let’s clear the air.


Step 1: What Is a Domain?


Think of your domain as your website’s address. It’s what people type into the browser to find you—your www.myawesomebrand.com.

But here’s the kicker: a domain isn’t a website. It’s just the name people use to get to your website. Without a host, that shiny domain is like having a street address with no house.


Step 2: What Is a Host?


Your host is the land where your website lives. It’s where all your files, images, and data are stored. When someone types in your domain, the host delivers your website to their screen. Think of it as the invisible engine running the show behind the scenes.

Here’s a common mistake people make: they think hosting companies own their websites. They don’t. Your host just rents you space to keep your files online. You’re still in control (or at least, you should be).


Step 3: Why Does the Difference Matter?


Here’s the truth bomb: many people spend too much time obsessing over the perfect domain and neglect their hosting. But what good is a fancy address if your website doesn’t load fast or keeps crashing? A weak host can sabotage even the most premium domain.


Step 4: How Do Hosts and Domains Work Together?


The domain and host need to work in harmony. Once you purchase a domain, you link it to your host. The domain points visitors to your host’s servers, where your website lives.

Imagine telling someone to visit your house (domain) but not giving them the directions (host). Without hosting, your website simply doesn’t exist online.


🔥 Why You Should Choose Your Host Carefully


Choosing a host is arguably more important than picking a domain. Here’s why:

  • Speed Matters: A strong host ensures your website loads fast, which keeps visitors happy.
  • Uptime Reliability: The right host minimizes downtime, so your website is always accessible.
  • Scalability: As your site grows, a good host can handle the extra traffic.
  • Security: Hosts play a crucial role in protecting your site from hackers and data breaches.

🌍 When Does the Domain Take the Lead?


While hosting is the engine, your domain is your brand’s first impression. A memorable, easy-to-type domain name can make a difference in attracting visitors. But remember: a strong host will always amplify the power of your domain.


🚀 Getting Started: The Perfect Host-Domain Combo

  1. Choose Your Host First: Start with a reliable hosting provider. Look for features like fast speeds, strong security, and scalability.
  2. Register Your Domain: Once you’ve got hosting in place, find a domain that aligns with your brand. Use tools like Namecheap or GoDaddy to search for availability.
  3. Link Them Together: Connect your domain to your host, and voilà—you’re live!

🤩 Final Thoughts

Think of a host and a domain as two sides of the same coin. You can’t have one without the other, but understanding their roles will save you time, money, and headaches.

Ready to build your online empire? Get started with a powerful host and a memorable domain, and you’ll have a website that’s not just live but thriving.

Start here:


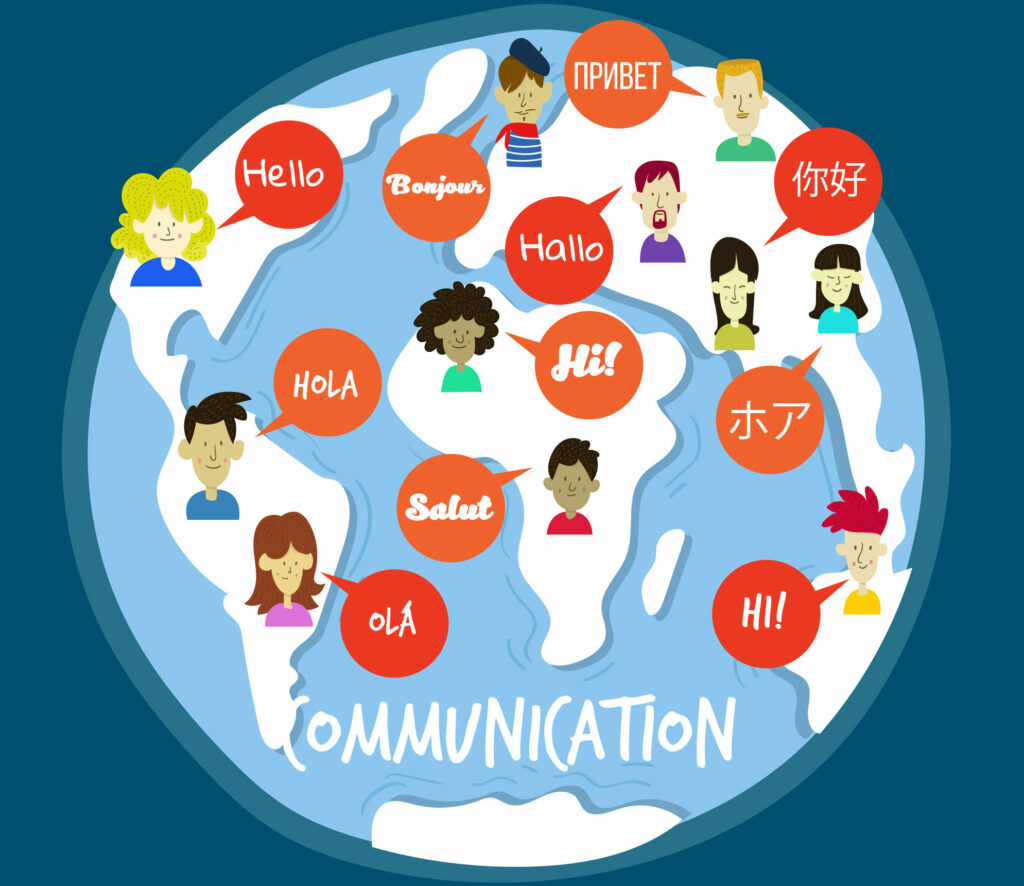
🌍Why Your Website Is Failing—And How GTranslate Can Save It


Introduction: Your Website is Losing Visitors—Here’s Why

Let’s face it—your website is losing customers every single day. Why? Because it’s trapped in a language bubble. While you’re busy creating amazing content, millions of potential visitors are passing you by simply because they can’t read your site. Does that sound like success to you?

It’s time to face the truth: if you’re not translating your website, you’re sabotaging your own success. But what if you could change that today? Meet GTranslate—the plugin that can turn your site from invisible to globally recognized. Stop missing out on millions of visitors.

Why Translation is Non-Negotiable: You might think that your content is great, but if it’s only in one language, you’re essentially cutting yourself off from the rest of the world. There’s an entire audience out there, waiting for what you have to offer—but they won’t even know it exists unless you translate your website.

This is your wake-up call. Multilingual sites don’t just get noticed—they dominate. Websites that are available in multiple languages earn higher rankings on Google, which translates to more organic traffic and sales. Still not convinced? Keep reading.

GTranslate in Action: Proof That It Works

Here’s where the rubber meets the road. After we integrated GTranslate, the results were nothing short of mind-blowing. We didn’t just see small gains—we witnessed an explosion in global traffic:

  • 565 Total Views in One Month
  • Visitors from the United States, France, Canada, Switzerland, and Germany dominated the traffic.

Here’s the Leaderboard of Countries That Couldn’t Resist Our Translated Content:

🥇 United States: 190 views
🥈 France: 146 views
🥉 Canada: 35 views
Switzerland: 31 views
Germany: 23 views

This isn’t just a plugin—it’s a passport to global success. These aren’t just numbers; these are real visitors who found their way to our site because we broke down the language barrier. Now, imagine that happening for YOUR business.


Visualizing the Global Takeover:

Numbers don’t lie, but visuals drive the point home. Here’s the cold, hard truth: these five countries alone made up the lion’s share of our traffic. That’s a whole new audience you’re missing out on if you’re not going global.

Now, picture this: Your site, reaching all corners of the globe, attracting traffic from every continent. You’re not just getting views; you’re building a global community of visitors who want to engage with your content. Are you really ready to leave that on the table?


Why GTranslate is Your Secret Weapon:

Here’s the hard truth: if your website isn’t multilingual, you’re actively pushing customers away. People won’t spend time on a site they can’t understand.

But here’s where GTranslate steps in:

  • Instant Translation: Zero coding required. Zero hassle. Just results.
  • SEO Boost: Google loves multilingual content. It ranks higher, meaning more free traffic from search engines around the world.
  • Customization: Personalize the plugin to match your brand’s voice and target only the languages that truly matter to your audience.

GTranslate isn’t just a translation tool; it’s the key to unlocking your full potential—and turning that potential into cold, hard profit.


How to Turn Your Website Into a Global Superstar:

  1. Download the GTranslate Plugin:
    It takes less than a minute if you’re using WordPress. Yes, it’s that easy.
    Get started now!
  2. Pick Your Languages:
    You don’t need to translate into every language under the sun. Focus on the ones that matter most for your business. But let me tell you: the more languages, the bigger the reach.
  3. Launch and Watch:
    Once you’ve launched your multilingual site, watch the traffic pour in. Track new visitors using analytics and get ready for the explosion of growth.

Final Thoughts: Are You Ready to Go Global?

Here’s the million-dollar question: Can you afford not to?

The internet is a massive, global marketplace, and GTranslate is your ticket to joining it. Don’t let language barriers limit your business’s potential. This is your opportunity to connect with millions of potential customers worldwide.

Stop waiting. Start translating.
The world is ready for your content. Are you ready for it?

Start Today and See the Difference!

Using Calendly? Here’s How to Ensure You Don’t Miss Clients!

When it comes to increasing consultation bookings, many business owners underestimate the potential of Calendly. But here’s the thing: Simply having a booking link isn’t enough.

Are you making the most of it? Or is your Calendly setup actually holding you back? Let’s dive into how you can fully integrate Calendly into your website to turn visitors into paying clients—and avoid the mistakes that most people make. 🚀


Your Schedule of Booked Consultations is Empty? Integrate Calendly into Your Website Now!

🌟 What Makes Calendly a Must-Have for Your Business?

Calendly eliminates scheduling friction by letting your potential clients book appointments instantly. But its true power lies in how you use it.

Here’s why Calendly is a game-changer for lead conversion:

1️⃣ Effortless Scheduling: Clients can book a slot without playing email tag, increasing the chances they’ll follow through.
2️⃣ Professional First Impression: A seamless booking system signals that your business is organized and trustworthy.
3️⃣ Works 24/7: Even when you’re unavailable, Calendly is capturing leads and booking appointments for you.

🔑 Pro Tip: The secret to success isn’t just using Calendly—it’s how you integrate it into your website for maximum visibility and action.


🚩 The #1 Mistake: Poor Integration

Many businesses hide their Calendly link on a generic contact page. This is a critical error! Visitors won’t take action if they can’t easily find your booking option.

The Fix? Full Integration.


💻 How I Boosted My Bookings with Calendly and WordPress

When I integrated Calendly into my WordPress site, I transformed it into a lead-conversion machine. Here’s exactly what I did:

1️⃣ Embedded Calendly with a Plugin: Using a WordPress plugin, I placed a Calendly widget directly on my homepage and service pages.
2️⃣ Added Actionable CTAs: Instead of “Book Now,” my CTAs say things like, “Let’s Discuss Your Business Growth!” to make it personal.
3️⃣ Used Pop-Ups: I integrated a pop-up that triggers when visitors spend 10 seconds on a page, urging them to book a free consultation.
4️⃣ Created Urgency: I highlighted “limited availability” to encourage visitors to act immediately.


🤔 Why Calendly Works Better with Integration

Calendly is powerful, but its success depends on how well it’s presented on your website. Here’s what makes integration crucial:

  • Higher Visibility = More Bookings: Prominently placed buttons or widgets outperform hidden links.
  • Custom CTAs = Better Engagement: Personal, direct messages inspire visitors to take action.
  • Urgency = Immediate Results: Highlighting limited slots motivates leads to book without hesitation.

🚀 Real Results: A 3x Increase in Bookings

After integrating Calendly the right way, my consultation bookings tripled. Instead of waiting for leads to email me, I now have a steady stream of scheduled calls directly through my website.

🔗 See how we help businesses with website creation to maximize lead conversion.


🌟 Ready to Boost Your Consultation Bookings?

If you’re not using Calendly (or not using it properly), you’re leaving money on the table. Here’s how to start:

✅ Add a visible, action-driven booking button to every page.
✅ Use compelling CTAs that encourage visitors to act.
✅ Highlight urgency to increase conversions.

💡 Need help integrating Calendly with your website? Whether you’re using WordPress or another platform, I can help you optimize your site for lead generation.

📆 Book a Free Consultation Here to get started or explore how we help businesses thrive.

📞 Have questions? Contact me directly on for personalized support.

🔗 Want to read more about how to grow your online business? Check out our articles here for actionable insights and tips.


🚀 Don’t Let Visitors Leave Without Booking

Your website has the potential to convert more leads than you think. By integrating Calendly the right way, you can take control of your bookings, impress visitors, and grow your business.

💬 Ready to take action? Let’s make your website work harder for you. Contact us today!

🌟 How to Animate Your Avatar with D-ID AI

Video Example :

D-ID’s AI-powered animation makes it super easy to turn your avatar into a lively, talking character. Here’s How to Animate Your Avatar with D-ID AI, but first check the result :

Step 1: Go to D-ID Studio

Visit D-ID’s AI Studio to get started.

Step 2: Upload Your Avatar or Character Image

Upload your static image of the character or avatar you want to animate. You can use avatars created with AI tools like DALL-E, MidJourney, or any other image you have. 🖼️

Step 3: Add a Voice or Script

You can either record a voiceover, upload a pre-recorded voice file, or use D-ID’s Text-to-Speech (TTS) feature to generate a voice. Simply type out the script you want your avatar to say, and the AI will generate a lifelike voiceover for it! 🎤💬

Step 4: Choose Animation Style

D-ID allows you to choose from various animation styles and expressions, so your avatar can smile, frown, or make gestures while speaking. Customize the movements to match the tone of your message. 🎭

Step 5: Preview and Adjust

Once you’ve added the voice and animation, preview the animation. You can make tweaks to the expressions, movements, and voice to ensure everything looks perfect.

Step 6: Download Your Animated Avatar

When you’re happy with the result, download your animated avatar and use it in your projects! You can upload it to social media, embed it in websites, or even use it in marketing campaigns. 🌍


🔥 Use Cases for Animated Avatars

  1. Social Media Content: Use animated avatars to create engaging posts, reels, or stories. Your audience will love the interactivity and creativity! 📱
  2. Presentations and Pitches: Wow your audience with a talking avatar during business presentations or pitches, making your message more memorable. 💼
  3. YouTube and Explainer Videos: Animated avatars can explain concepts, tell stories, or share information in a fun and engaging way on YouTube and other video platforms. 🎥
  4. Customer Service Bots: Use an animated avatar for virtual customer service, guiding users through products or services with a friendly face. 🤖

🤖 Why D-ID AI for Avatar Animation?

D-ID stands out because of its simple interface, high-quality animations, and ability to generate lifelike expressions. Here’s why you’ll love using it:

  • Easy to Use: You don’t need to be a professional animator. D-ID’s AI does the hard work for you, allowing anyone to create animated avatars in minutes! ⏱️
  • Multiple Languages: D-ID’s TTS supports various languages, making it ideal for global content creators. 🌍
  • Customizable: You can control how your avatar speaks, moves, and expresses emotions, making it perfect for personal branding or storytelling. 🎭
  • Lifelike Expressions: The AI captures facial movements, ensuring your avatar looks realistic and natural. 🤩

🚀 Get Started with D-ID Today!

Bringing your AI avatar to life has never been easier! Whether you’re using your avatar for social media content, presentations, or marketing, D-ID’s AI-powered animation makes it possible to add a whole new dimension to your projects.

Ready to start animating your avatar? Click here to get started:

WhatsApp Button or AI Chatbot: The Lead Conversion Secret 💬🤖

When it comes to converting website visitors into leads, two powerful tools dominate the conversation: the WhatsApp button and the AI chatbot. But which one truly delivers results?

While AI chatbots are often hailed as cutting-edge technology, they might not be as effective as you think—especially if you’re just starting out or don’t have a large audience. So, is the traditional WhatsApp button actually the better choice? Let’s dive into the pros, cons, and the surprising truth about these tools. 🚀


🌟 1. WhatsApp Button: Perfect for Personal Connections

The WhatsApp button is a simple, straightforward solution that creates a direct channel for real-time communication.

Here’s why it’s so effective:

1️⃣ Builds Trust Instantly: Visitors appreciate talking to a real person, making it easier to build a relationship and close deals.

2️⃣ Simpler Setup: Adding a WhatsApp button is quick and hassle-free, requiring minimal tech know-how.

3️⃣ Cost-Effective for Small Audiences: Unlike AI chatbots, which often come with monthly fees, the WhatsApp button lets you focus on engaging with the leads you already have.

🔑 Pro Tip: Make sure you or your team are available to respond quickly. Speed is critical for maintaining engagement.


🌟 2. AI Chatbot: Automation That’s Not Always Ideal

AI chatbots have gained popularity for their ability to handle repetitive tasks and offer 24/7 support. But are they worth it for every website? 🤔

Here’s the truth:

1️⃣ Great for High-Traffic Sites: If you have a large audience and receive hundreds of inquiries daily, chatbots are a lifesaver for automating responses and qualifying leads.

2️⃣ Not Always Personal: Chatbots can feel impersonal, especially for small businesses where visitors expect to talk to a human.

3️⃣ Costly Without ROI: For websites with low traffic, investing in a chatbot may not justify the cost since fewer visitors mean fewer conversations.

🔑 Pro Tip: If you’re considering a chatbot, start with a basic version and scale up as your audience grows.


🤔 WhatsApp Button vs. AI Chatbot: Which Should You Choose?

Here’s the controversial part: If your website doesn’t have significant traffic, an AI chatbot might actually hurt your conversion efforts. Why?

  • Low Engagement: Without enough visitors, chatbots often sit idle, creating a poor return on investment.
  • Missed Personal Touch: Visitors on small or medium-sized websites expect personal, human conversations—something only a WhatsApp button can offer.

On the other hand, the WhatsApp button shines for businesses that are still growing their audience. It provides a direct, personal interaction that builds trust and makes leads feel valued.


🚀 The Verdict: Start Small, Think Big

If you’re just starting out or have a modest audience, stick with the WhatsApp button. It’s cost-effective, easy to implement, and fosters genuine human connections. As your website grows and traffic increases, you can explore AI chatbots to handle the demand.


🌟 Make the Right Choice for Your Website

Don’t let visitors leave your site without taking action! Start with a WhatsApp button to maximize engagement and build trust. Once your audience grows, consider scaling with an AI chatbot to automate and expand your reach.

Ready to boost your conversions? It’s time to make the choice that works best for your business! 💬✨


💡 Want to include these features in your website? Let’s make it happen! Contact us on WhatsApp today or book a consultation to get started!

Remove Watermarks Effortlessly with ClipDrop’s AI Text Remover 🖼️✨

Have you ever found the perfect image, only to realize it’s spoiled by a watermark? 😩 No need to worry! With ClipDrop’s AI-powered Text Remover, you can easily and quickly remove watermarks, making your image clean and professional.

In this article, I’ll show you how to use this tool and why it’s a game-changer for image editing. Let’s dive in! 💻🎨


🔍 Why Remove Watermarks with AI?

Watermarks can be a major obstacle, especially when using images for presentations, social media posts, or websites. Traditional methods of manually removing them can be tedious and may damage the image’s quality. That’s where AI comes in! 🚀

With AI-powered tools like ClipDrop, you can remove watermarks seamlessly while maintaining the integrity of the image. No Photoshop skills required—just upload, click, and your image is good to go! 🖼️✨


🌟 How to Remove Watermarks Using ClipDrop’s AI Text Remover

Here’s a step-by-step guide to using ClipDrop’s Text Remover to eliminate watermarks in just a few clicks:

  1. Go to ClipDrop: ClipDrop Text Remover
  1. Upload your image—whether it’s an AI-generated artwork, a professional image, or a social media graphic.
  1. Select the area of the watermark you want to remove.
  2. Click on “Remove” and let ClipDrop’s AI do the magic! ✨
  3. Download your clean, watermark-free image and use it wherever you need. 📥

🔑 Pro Tip: Make sure to zoom in and precisely select the watermark area for the best results!


🤖 Why Use ClipDrop’s AI Text Remover?

Here’s why ClipDrop stands out for watermark removal:

  • Super Simple: No need for complex editing skills—ClipDrop’s AI handles it all. 🧠
  • Time-Saving: Watermarks are removed within seconds, letting you focus on creating content, not editing. ⏱️
  • Preserves Quality: Unlike manual editing, ClipDrop ensures your image quality remains intact while removing text or watermarks. 🎯

🖼️ When Should You Remove Watermarks?

Removing watermarks is ideal when you have the right to use the image but don’t want to display distracting logos or text overlays. Use it for:

  • Social media graphics 🖥️
  • Presentations 📊
  • Digital art 🎨
  • Web design 💻

It’s important to ensure you have proper rights to the image before removing any watermarks. Always follow legal guidelines when working with protected content. 🛑


🚀 Get Started with ClipDrop Today!

Ready to remove those pesky watermarks and enjoy a polished, professional look for your images? Start using ClipDrop’s AI Text Remover today and see how easy it is to get watermark-free images in seconds!

Here’s the link to get started: ClipDrop Text Remover 🌐. It’s time to upgrade your image editing game—give it a try now! 🏆

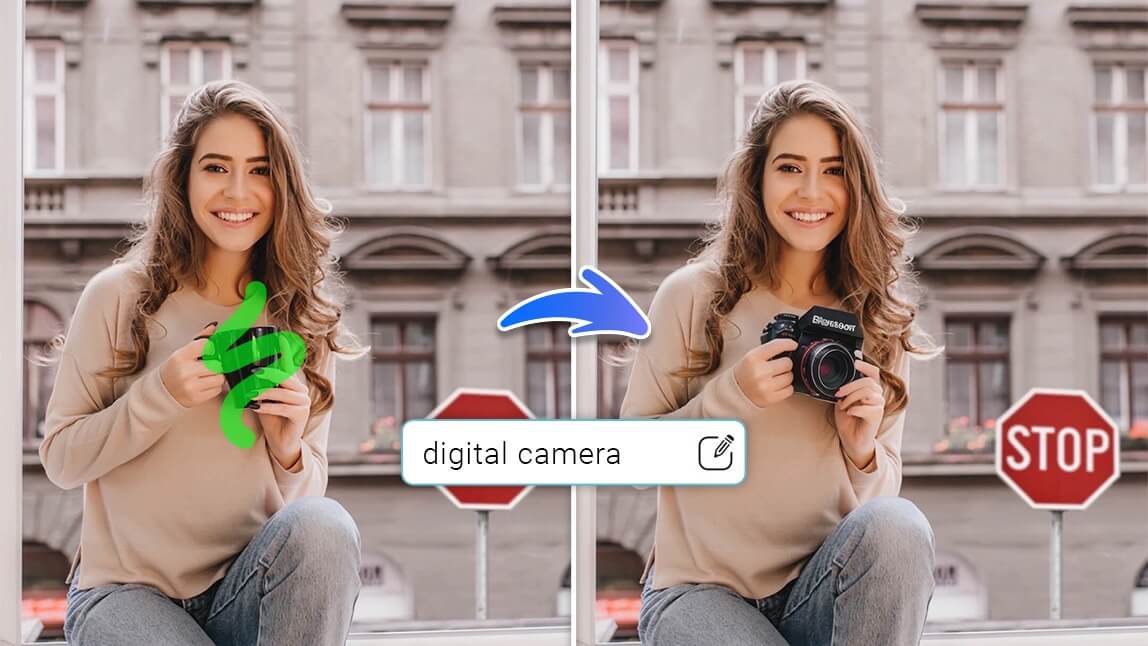
Customize Your AI Avatar’s Background with Adobe Firefly 🎨

So, you’ve got your AI avatar, and it looks amazing! But what if you want to make the background more unique? Maybe add a cup of coffee ☕ or a microphone 🎤 to match your personal vibe. Well, with Adobe Firefly’s Generative Fill, you can do just that!

Let’s explore how you can easily customize the background of your AI avatar and add fun elements to make it truly yours. 🌟


🔍 Why Customize Your Background?

Your avatar reflects your personal brand, so why not give it a unique background that matches your style or profession? Whether it’s for social media, your website, or a digital project, a customized background can make your avatar stand out. 💼

With Adobe Firefly, you can effortlessly add or change background elements, making it feel more alive and suited to your needs.


🌟 How to Use Adobe Firefly’s Generative Fill to Customize Your Background

Here’s how you can start adding custom elements like a cup of coffee, a microphone, or whatever fits your vibe:

  1. Open Adobe Firefly: Adobe Firefly Generative Fill
  2. Upload your AI avatar image—you can use any avatar you’ve generated.
  3. Select the area of the background where you want to make changes.
  1. Use the Generative Fill feature to describe what you want to add. For example: “Add a cup of coffee on the desk” or “Place a microphone on the table.”
  2. Generate your new image—you’ll see your background updated with the elements you requested in just seconds! ⏱️
  1. Make any necessary tweaks, then download your newly customized avatar with its enhanced background.

🔑 Pro Tip: You can be as specific or as creative as you like with the Generative Fill tool. Try adding small details that represent your profession or personality! 🌟


🖼️ Ideas for Customizing Your Avatar’s Background

Here are a few fun ideas to get you started with customizing your avatar:

  • Cup of Coffee ☕ for a cozy, creative vibe.
  • Microphone 🎤 to reflect a speaker or podcasting theme.
  • Books 📚 if you’re portraying a knowledgeable or studious persona.
  • Plants 🌿 for a fresh, natural touch.

Don’t hesitate to experiment with different elements until you find the perfect combination that represents your unique personality or brand! 🎨


🤖 Why Adobe Firefly’s Generative Fill?

Unlike manual photo editing, Adobe Firefly’s AI-powered Generative Fill does the heavy lifting for you. No need for complex Photoshop skills—just describe what you want, and the AI will do the rest! It’s quick, easy, and the results are stunningly realistic. 🌍✨


🚀 Start Customizing Your Avatar Today!

Whether you’re a content creator, entrepreneur, or AI enthusiast, adding personal touches to your avatar’s background will make it more relatable and professional. With Adobe Firefly’s Generative Fill, the possibilities are endless! 🎨

Here’s the link to get started

👇👇👇👇👇👇👇👇👇

Adobe Firefly Generative Fill. Ready to make your avatar truly yours? Let’s go!

Upscale Your Images to 4K with CapCut’s AI Image Upscaler 🚀

Have you ever created an awesome AI-generated image only to realize the quality wasn’t up to par? 😩 Don’t worry! AI-generated images are great, but they can sometimes come out with lower resolution or lack the sharpness you want.

Well, there’s a solution—and it’s called image upscaling! 🎨 Let’s talk about how you can use CapCut’s Image Upscaler to transform your images into stunning 4K visuals.


🔍 Why AI-Generated Images Might Need Upscaling

AI tools are fantastic for creating images quickly, but the downside? Sometimes they generate images with low resolution or pixelation, especially when you’re aiming for something detailed. This is where image upscaling comes in to save the day. 🌟

CapCut offers an incredible image upscaling tool that allows you to instantly boost the quality of your images, making them sharp, clear, and suitable for any use—whether it’s for social media, websites, or personal projects. 📈


🌟 How to Use CapCut’s 4K Image Upscaler for Best Results

Here’s a simple guide to upscale your images in no time:

  1. Head over to CapCut’s Image Upscaler Tool: CapCut Image Upscaler
  2. Upload your AI-generated image (or any image that needs an upgrade).
  3. Choose the 4K resolution option for an amazing, ultra-sharp result. This ensures your image looks crisp and professional at any size. 🖼️
  4. Let the tool process your image—in just a few moments, you’ll have a 4K masterpiece ready to download! 💾

🔑 Pro Tip: Always choose the highest resolution available to future-proof your images, especially if you plan to use them in presentations, videos, or printed media.


🤔 Why 4K Resolution?

When it comes to visuals, resolution matters. A higher resolution (like 4K) means more detail, clarity, and sharpness, which makes a huge difference—especially for digital artwork or avatars. By using 4K, you ensure your images look professional, no matter where they’re displayed. ✨

Think about it this way: a low-quality image may look okay on a phone screen, but blow it up on a larger display or print, and suddenly those imperfections become glaringly obvious. The CapCut Upscaler solves this problem, giving you crystal-clear results. 🖥️


🚀 Elevate Your Image Quality Today!

Whether you’re creating avatars, social media graphics, or AI art, using an image upscaler will instantly take your content to the next level. 🏆 It’s simple, fast, and the results speak for themselves. Plus, with CapCut’s 4K resolution option, you’re guaranteed a professional finish every time.


💡 Take Action Now!

Don’t let low-resolution images hold you back! Start using CapCut’s Image Upscaler to enhance the quality of your AI-generated images today. Here’s the link again to get started: CapCut Image Upscaler 🖼️.

Got any questions? Feel free to reach out—I’m here to help you get the best results possible! 😊

Open chat
Hello
How can we help you?