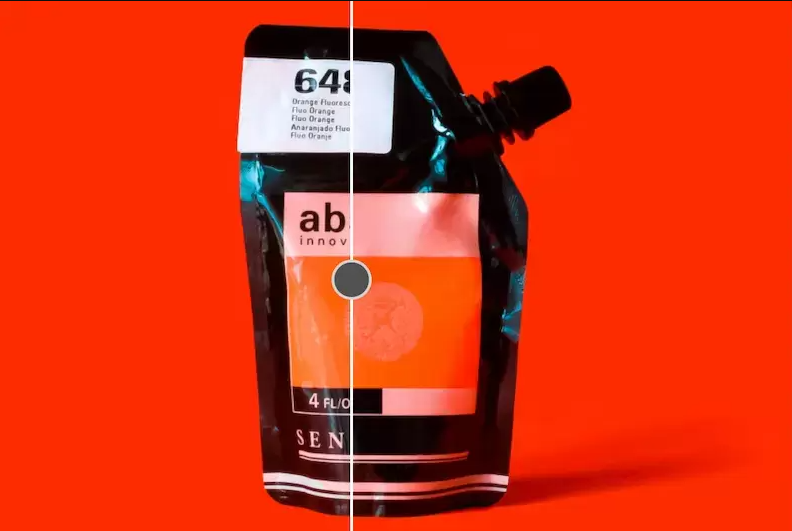
Remove Watermarks Effortlessly with ClipDrop’s AI Text Remover 🖼️✨

Have you ever found the perfect image, only to realize it’s spoiled by a watermark? 😩 No need to worry! With ClipDrop’s AI-powered Text Remover, you can easily and quickly remove watermarks, making your image clean and professional.

In this article, I’ll show you how to use this tool and why it’s a game-changer for image editing. Let’s dive in! 💻🎨


🔍 Why Remove Watermarks with AI?

Watermarks can be a major obstacle, especially when using images for presentations, social media posts, or websites. Traditional methods of manually removing them can be tedious and may damage the image’s quality. That’s where AI comes in! 🚀

With AI-powered tools like ClipDrop, you can remove watermarks seamlessly while maintaining the integrity of the image. No Photoshop skills required—just upload, click, and your image is good to go! 🖼️✨


🌟 How to Remove Watermarks Using ClipDrop’s AI Text Remover

Here’s a step-by-step guide to using ClipDrop’s Text Remover to eliminate watermarks in just a few clicks:

  1. Go to ClipDrop: ClipDrop Text Remover
  1. Upload your image—whether it’s an AI-generated artwork, a professional image, or a social media graphic.
  1. Select the area of the watermark you want to remove.
  2. Click on “Remove” and let ClipDrop’s AI do the magic! ✨
  3. Download your clean, watermark-free image and use it wherever you need. 📥

🔑 Pro Tip: Make sure to zoom in and precisely select the watermark area for the best results!


🤖 Why Use ClipDrop’s AI Text Remover?

Here’s why ClipDrop stands out for watermark removal:

  • Super Simple: No need for complex editing skills—ClipDrop’s AI handles it all. 🧠
  • Time-Saving: Watermarks are removed within seconds, letting you focus on creating content, not editing. ⏱️
  • Preserves Quality: Unlike manual editing, ClipDrop ensures your image quality remains intact while removing text or watermarks. 🎯

🖼️ When Should You Remove Watermarks?

Removing watermarks is ideal when you have the right to use the image but don’t want to display distracting logos or text overlays. Use it for:

  • Social media graphics 🖥️
  • Presentations 📊
  • Digital art 🎨
  • Web design 💻

It’s important to ensure you have proper rights to the image before removing any watermarks. Always follow legal guidelines when working with protected content. 🛑


🚀 Get Started with ClipDrop Today!

Ready to remove those pesky watermarks and enjoy a polished, professional look for your images? Start using ClipDrop’s AI Text Remover today and see how easy it is to get watermark-free images in seconds!

Here’s the link to get started: ClipDrop Text Remover 🌐. It’s time to upgrade your image editing game—give it a try now! 🏆
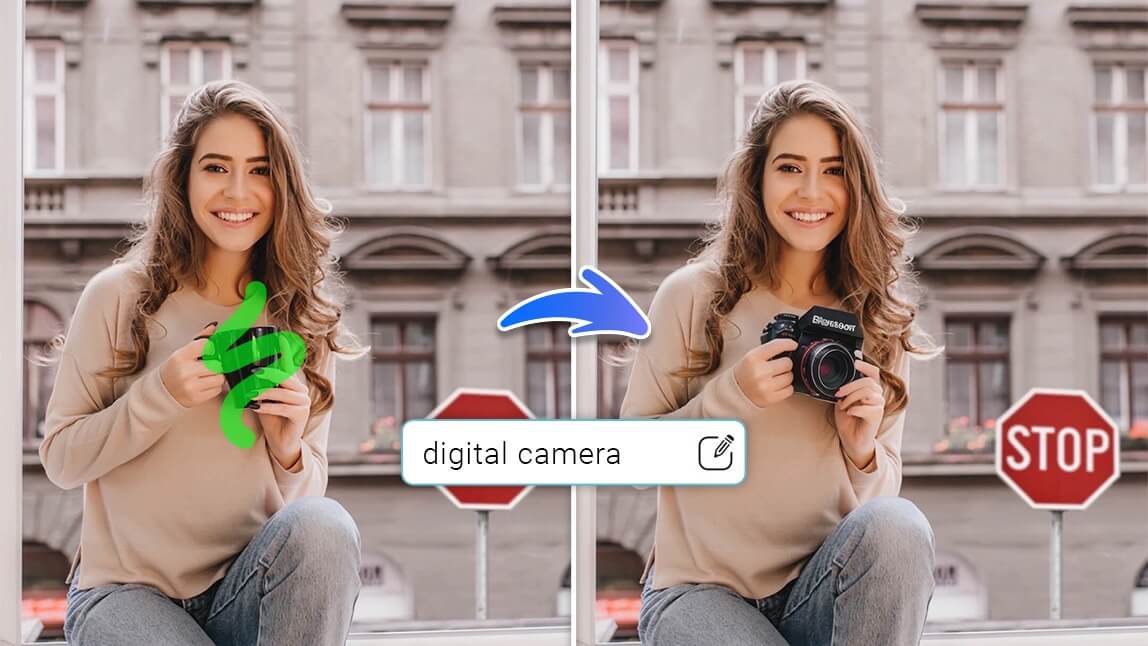
Customize Your AI Avatar’s Background with Adobe Firefly 🎨

So, you’ve got your AI avatar, and it looks amazing! But what if you want to make the background more unique? Maybe add a cup of coffee ☕ or a microphone 🎤 to match your personal vibe. Well, with Adobe Firefly’s Generative Fill, you can do just that!

Let’s explore how you can easily customize the background of your AI avatar and add fun elements to make it truly yours. 🌟


🔍 Why Customize Your Background?

Your avatar reflects your personal brand, so why not give it a unique background that matches your style or profession? Whether it’s for social media, your website, or a digital project, a customized background can make your avatar stand out. 💼

With Adobe Firefly, you can effortlessly add or change background elements, making it feel more alive and suited to your needs.


🌟 How to Use Adobe Firefly’s Generative Fill to Customize Your Background

Here’s how you can start adding custom elements like a cup of coffee, a microphone, or whatever fits your vibe:

  1. Open Adobe Firefly: Adobe Firefly Generative Fill
  2. Upload your AI avatar image—you can use any avatar you’ve generated.
  3. Select the area of the background where you want to make changes.
  1. Use the Generative Fill feature to describe what you want to add. For example: “Add a cup of coffee on the desk” or “Place a microphone on the table.”
  2. Generate your new image—you’ll see your background updated with the elements you requested in just seconds! ⏱️
  1. Make any necessary tweaks, then download your newly customized avatar with its enhanced background.

🔑 Pro Tip: You can be as specific or as creative as you like with the Generative Fill tool. Try adding small details that represent your profession or personality! 🌟


🖼️ Ideas for Customizing Your Avatar’s Background

Here are a few fun ideas to get you started with customizing your avatar:

  • Cup of Coffee ☕ for a cozy, creative vibe.
  • Microphone 🎤 to reflect a speaker or podcasting theme.
  • Books 📚 if you’re portraying a knowledgeable or studious persona.
  • Plants 🌿 for a fresh, natural touch.

Don’t hesitate to experiment with different elements until you find the perfect combination that represents your unique personality or brand! 🎨


🤖 Why Adobe Firefly’s Generative Fill?

Unlike manual photo editing, Adobe Firefly’s AI-powered Generative Fill does the heavy lifting for you. No need for complex Photoshop skills—just describe what you want, and the AI will do the rest! It’s quick, easy, and the results are stunningly realistic. 🌍✨


🚀 Start Customizing Your Avatar Today!

Whether you’re a content creator, entrepreneur, or AI enthusiast, adding personal touches to your avatar’s background will make it more relatable and professional. With Adobe Firefly’s Generative Fill, the possibilities are endless! 🎨

Here’s the link to get started

👇👇👇👇👇👇👇👇👇

Adobe Firefly Generative Fill. Ready to make your avatar truly yours? Let’s go!

Open chat
Hello
How can we help you?