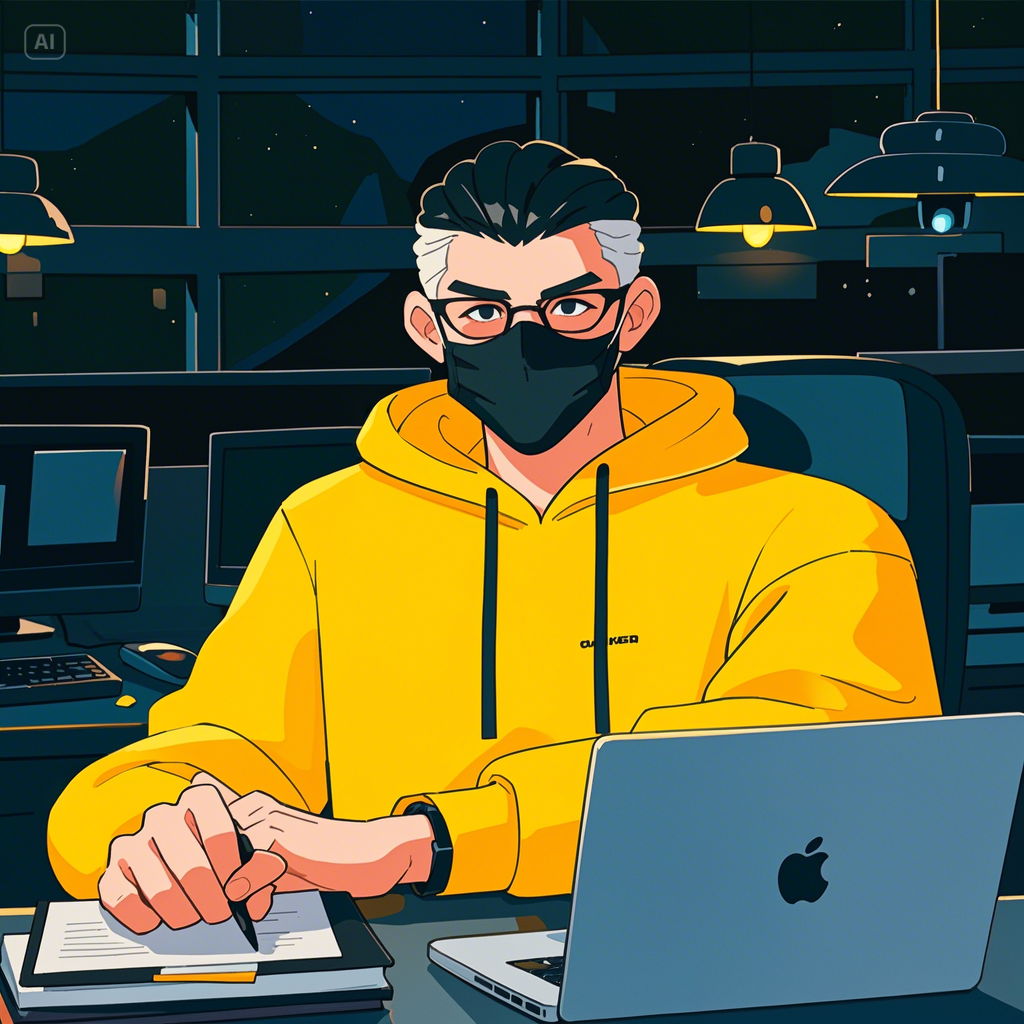
🌟 How to Animate Your Avatar with D-ID AI

Video Example :

D-ID’s AI-powered animation makes it super easy to turn your avatar into a lively, talking character. Here’s How to Animate Your Avatar with D-ID AI, but first check the result :

Step 1: Go to D-ID Studio

Visit D-ID’s AI Studio to get started.

Step 2: Upload Your Avatar or Character Image

Upload your static image of the character or avatar you want to animate. You can use avatars created with AI tools like DALL-E, MidJourney, or any other image you have. 🖼️

Step 3: Add a Voice or Script

You can either record a voiceover, upload a pre-recorded voice file, or use D-ID’s Text-to-Speech (TTS) feature to generate a voice. Simply type out the script you want your avatar to say, and the AI will generate a lifelike voiceover for it! 🎤💬

Step 4: Choose Animation Style

D-ID allows you to choose from various animation styles and expressions, so your avatar can smile, frown, or make gestures while speaking. Customize the movements to match the tone of your message. 🎭

Step 5: Preview and Adjust

Once you’ve added the voice and animation, preview the animation. You can make tweaks to the expressions, movements, and voice to ensure everything looks perfect.

Step 6: Download Your Animated Avatar

When you’re happy with the result, download your animated avatar and use it in your projects! You can upload it to social media, embed it in websites, or even use it in marketing campaigns. 🌍


🔥 Use Cases for Animated Avatars

  1. Social Media Content: Use animated avatars to create engaging posts, reels, or stories. Your audience will love the interactivity and creativity! 📱
  2. Presentations and Pitches: Wow your audience with a talking avatar during business presentations or pitches, making your message more memorable. 💼
  3. YouTube and Explainer Videos: Animated avatars can explain concepts, tell stories, or share information in a fun and engaging way on YouTube and other video platforms. 🎥
  4. Customer Service Bots: Use an animated avatar for virtual customer service, guiding users through products or services with a friendly face. 🤖

🤖 Why D-ID AI for Avatar Animation?

D-ID stands out because of its simple interface, high-quality animations, and ability to generate lifelike expressions. Here’s why you’ll love using it:

  • Easy to Use: You don’t need to be a professional animator. D-ID’s AI does the hard work for you, allowing anyone to create animated avatars in minutes! ⏱️
  • Multiple Languages: D-ID’s TTS supports various languages, making it ideal for global content creators. 🌍
  • Customizable: You can control how your avatar speaks, moves, and expresses emotions, making it perfect for personal branding or storytelling. 🎭
  • Lifelike Expressions: The AI captures facial movements, ensuring your avatar looks realistic and natural. 🤩

🚀 Get Started with D-ID Today!

Bringing your AI avatar to life has never been easier! Whether you’re using your avatar for social media content, presentations, or marketing, D-ID’s AI-powered animation makes it possible to add a whole new dimension to your projects.

Ready to start animating your avatar? Click here to get started:
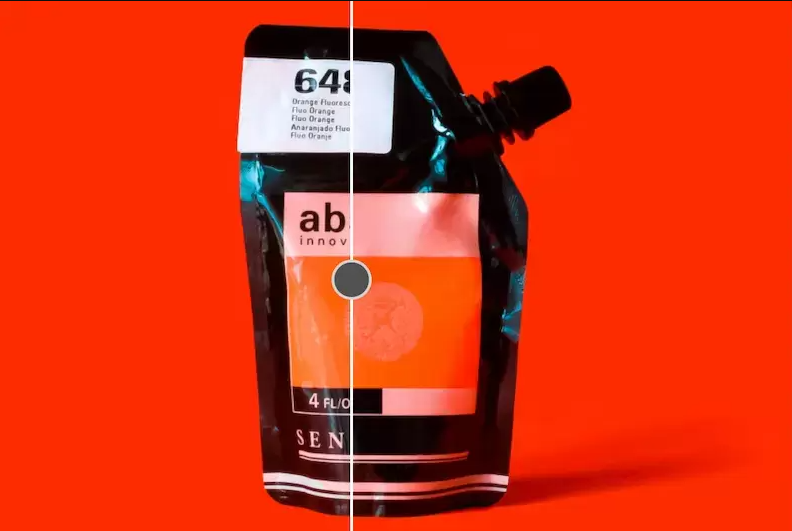
Remove Watermarks Effortlessly with ClipDrop’s AI Text Remover 🖼️✨

Have you ever found the perfect image, only to realize it’s spoiled by a watermark? 😩 No need to worry! With ClipDrop’s AI-powered Text Remover, you can easily and quickly remove watermarks, making your image clean and professional.

In this article, I’ll show you how to use this tool and why it’s a game-changer for image editing. Let’s dive in! 💻🎨


🔍 Why Remove Watermarks with AI?

Watermarks can be a major obstacle, especially when using images for presentations, social media posts, or websites. Traditional methods of manually removing them can be tedious and may damage the image’s quality. That’s where AI comes in! 🚀

With AI-powered tools like ClipDrop, you can remove watermarks seamlessly while maintaining the integrity of the image. No Photoshop skills required—just upload, click, and your image is good to go! 🖼️✨


🌟 How to Remove Watermarks Using ClipDrop’s AI Text Remover

Here’s a step-by-step guide to using ClipDrop’s Text Remover to eliminate watermarks in just a few clicks:

  1. Go to ClipDrop: ClipDrop Text Remover
  1. Upload your image—whether it’s an AI-generated artwork, a professional image, or a social media graphic.
  1. Select the area of the watermark you want to remove.
  2. Click on “Remove” and let ClipDrop’s AI do the magic! ✨
  3. Download your clean, watermark-free image and use it wherever you need. 📥

🔑 Pro Tip: Make sure to zoom in and precisely select the watermark area for the best results!


🤖 Why Use ClipDrop’s AI Text Remover?

Here’s why ClipDrop stands out for watermark removal:

  • Super Simple: No need for complex editing skills—ClipDrop’s AI handles it all. 🧠
  • Time-Saving: Watermarks are removed within seconds, letting you focus on creating content, not editing. ⏱️
  • Preserves Quality: Unlike manual editing, ClipDrop ensures your image quality remains intact while removing text or watermarks. 🎯

🖼️ When Should You Remove Watermarks?

Removing watermarks is ideal when you have the right to use the image but don’t want to display distracting logos or text overlays. Use it for:

  • Social media graphics 🖥️
  • Presentations 📊
  • Digital art 🎨
  • Web design 💻

It’s important to ensure you have proper rights to the image before removing any watermarks. Always follow legal guidelines when working with protected content. 🛑


🚀 Get Started with ClipDrop Today!

Ready to remove those pesky watermarks and enjoy a polished, professional look for your images? Start using ClipDrop’s AI Text Remover today and see how easy it is to get watermark-free images in seconds!

Here’s the link to get started: ClipDrop Text Remover 🌐. It’s time to upgrade your image editing game—give it a try now! 🏆

Upscale Your Images to 4K with CapCut’s AI Image Upscaler 🚀

Have you ever created an awesome AI-generated image only to realize the quality wasn’t up to par? 😩 Don’t worry! AI-generated images are great, but they can sometimes come out with lower resolution or lack the sharpness you want.

Well, there’s a solution—and it’s called image upscaling! 🎨 Let’s talk about how you can use CapCut’s Image Upscaler to transform your images into stunning 4K visuals.


🔍 Why AI-Generated Images Might Need Upscaling

AI tools are fantastic for creating images quickly, but the downside? Sometimes they generate images with low resolution or pixelation, especially when you’re aiming for something detailed. This is where image upscaling comes in to save the day. 🌟

CapCut offers an incredible image upscaling tool that allows you to instantly boost the quality of your images, making them sharp, clear, and suitable for any use—whether it’s for social media, websites, or personal projects. 📈


🌟 How to Use CapCut’s 4K Image Upscaler for Best Results

Here’s a simple guide to upscale your images in no time:

  1. Head over to CapCut’s Image Upscaler Tool: CapCut Image Upscaler
  2. Upload your AI-generated image (or any image that needs an upgrade).
  3. Choose the 4K resolution option for an amazing, ultra-sharp result. This ensures your image looks crisp and professional at any size. 🖼️
  4. Let the tool process your image—in just a few moments, you’ll have a 4K masterpiece ready to download! 💾

🔑 Pro Tip: Always choose the highest resolution available to future-proof your images, especially if you plan to use them in presentations, videos, or printed media.


🤔 Why 4K Resolution?

When it comes to visuals, resolution matters. A higher resolution (like 4K) means more detail, clarity, and sharpness, which makes a huge difference—especially for digital artwork or avatars. By using 4K, you ensure your images look professional, no matter where they’re displayed. ✨

Think about it this way: a low-quality image may look okay on a phone screen, but blow it up on a larger display or print, and suddenly those imperfections become glaringly obvious. The CapCut Upscaler solves this problem, giving you crystal-clear results. 🖥️


🚀 Elevate Your Image Quality Today!

Whether you’re creating avatars, social media graphics, or AI art, using an image upscaler will instantly take your content to the next level. 🏆 It’s simple, fast, and the results speak for themselves. Plus, with CapCut’s 4K resolution option, you’re guaranteed a professional finish every time.


💡 Take Action Now!

Don’t let low-resolution images hold you back! Start using CapCut’s Image Upscaler to enhance the quality of your AI-generated images today. Here’s the link again to get started: CapCut Image Upscaler 🖼️.

Got any questions? Feel free to reach out—I’m here to help you get the best results possible! 😊

HowCreate Your Own Avatar Using Text-to-Image AI ✨

Are you ready to bring your own avatars to life with AI magic? 🚀 Creating an avatar has never been easier, thanks to tools like CapCut’s Text-to-Image functionality. Whether you’re a content creator, influencer, or just someone looking to create something cool for fun, this feature allows you to generate personalized images in just a few clicks!

Let me walk you through a simple yet powerful prompt that will help you create a dynamic anime-style avatar. Plus, I’ll show you how you can build your very own avatar starting with an inspiring example.


🧑‍🎨 How to Use Text-to-Image AI to Create Avatars

The idea here is to turn your creative vision into reality by typing a detailed description of the avatar you want to create, and letting AI take care of the rest! You don’t need to be an artist. Just imagine your ideal character, and let the text-to-image tool do the heavy lifting.

One of my favorite prompts to create avatars goes like this:

🔮 Avatar Prompt for Inspiration:

ANIME FRIENDLY-LOOKING MALE BUSINESS CHARACTER WEARING A BLACK FACE MASK, A YELLOW HOODIE, AND SUNGLASSES. HE IS SITTING BEHIND HIS LAPTOP IN HIS OFFICE WITH HIS ARMS ON HIS DESK. IT’S NIGHT, AND THE ROOM IS FILLED WITH VOLUMETRIC LIGHTING. HE’S LOOKING STRAIGHT AHEAD, FACING THE CAMERA, SITTING STRAIGHT, CENTERED, WITH A MINIMALISTIC, BOLD ILLUSTRATION STYLE IN 8K RESOLUTION.

🔑 Pro Tip: When creating your own prompt, focus on details like clothing, environment, lighting, and the overall style to match the vibe you’re going for.

You can tweak the details in this prompt to reflect your own style—maybe change the clothing or the background! You want your avatar to represent YOU or your brand, so go wild with customization. 😎


🚀 How to Generate the Perfect Avatar Using CapCut

With CapCut’s Text-to-Image tool, generating avatars is quick and easy. Here’s how you can use it to bring your vision to life:

  1. Go to CapCut’s Magic Tools: CapCut Text-to-Image Tool
  2. Paste your avatar prompt into the description box.
  3. Adjust your settings to tweak the image style, format, and resolution to match your brand’s aesthetic.
  4. Generate your image and watch as AI creates your very own avatar in seconds! 🎨

Boom! Now you’ve got the base image that can be the foundation for even more creativity—whether you want to animate it, add effects, or use it as is for your social media profile or projects!


🔥 Why AI-Generated Avatars Are a Game-Changer

Creating an avatar manually can be time-consuming and require design skills, but with AI, you skip the hassle and jump straight into creativity! 💡 Here’s why you should try text-to-image AI for your avatars:

  • Speed: Instantly generate high-quality images in seconds.
  • Customization: Tweak the prompt to match your unique style.
  • No Art Skills Needed: Even if you’re not an artist, you can still create professional-looking avatars.

🏆 Let’s Create Together!

I’m genuinely excited for you to start experimenting with this powerful tool. AI is opening up endless possibilities for creative expression, and I’m here to help you make the most of it. 😃 I believe that anyone can unlock their creative potential with the right tools, and AI-generated avatars are the perfect place to start!


✍️ Take Action Now!

Start playing with the CapCut tool today and make your own avatars! Here’s the link again to get started: CapCut Text-to-Image Tool 🎨.

If you have any questions, feel free to DM me—I’m always happy to help! Let’s create something awesome together. 🚀

Open chat
Hello
How can we help you?